DB04r Firing System Online Manual
- Added on June 28, 2021
- Category: Firing Systems
- Last updated: February 10, 2023
The manuals provided with many DB04r systems – particularly if ordered directly from China – are basic to say the least. So, I have created my own comprehensive online manual covering all of the unit’s features.
Table of contents:
Overview and features
The DB04r is a remote firing unit with 4 independent cues (outputs to igniters) which are fired using a remote control. It is possible to connect more than one igniter to each cue, but all of the igniters in that cue will fire together.
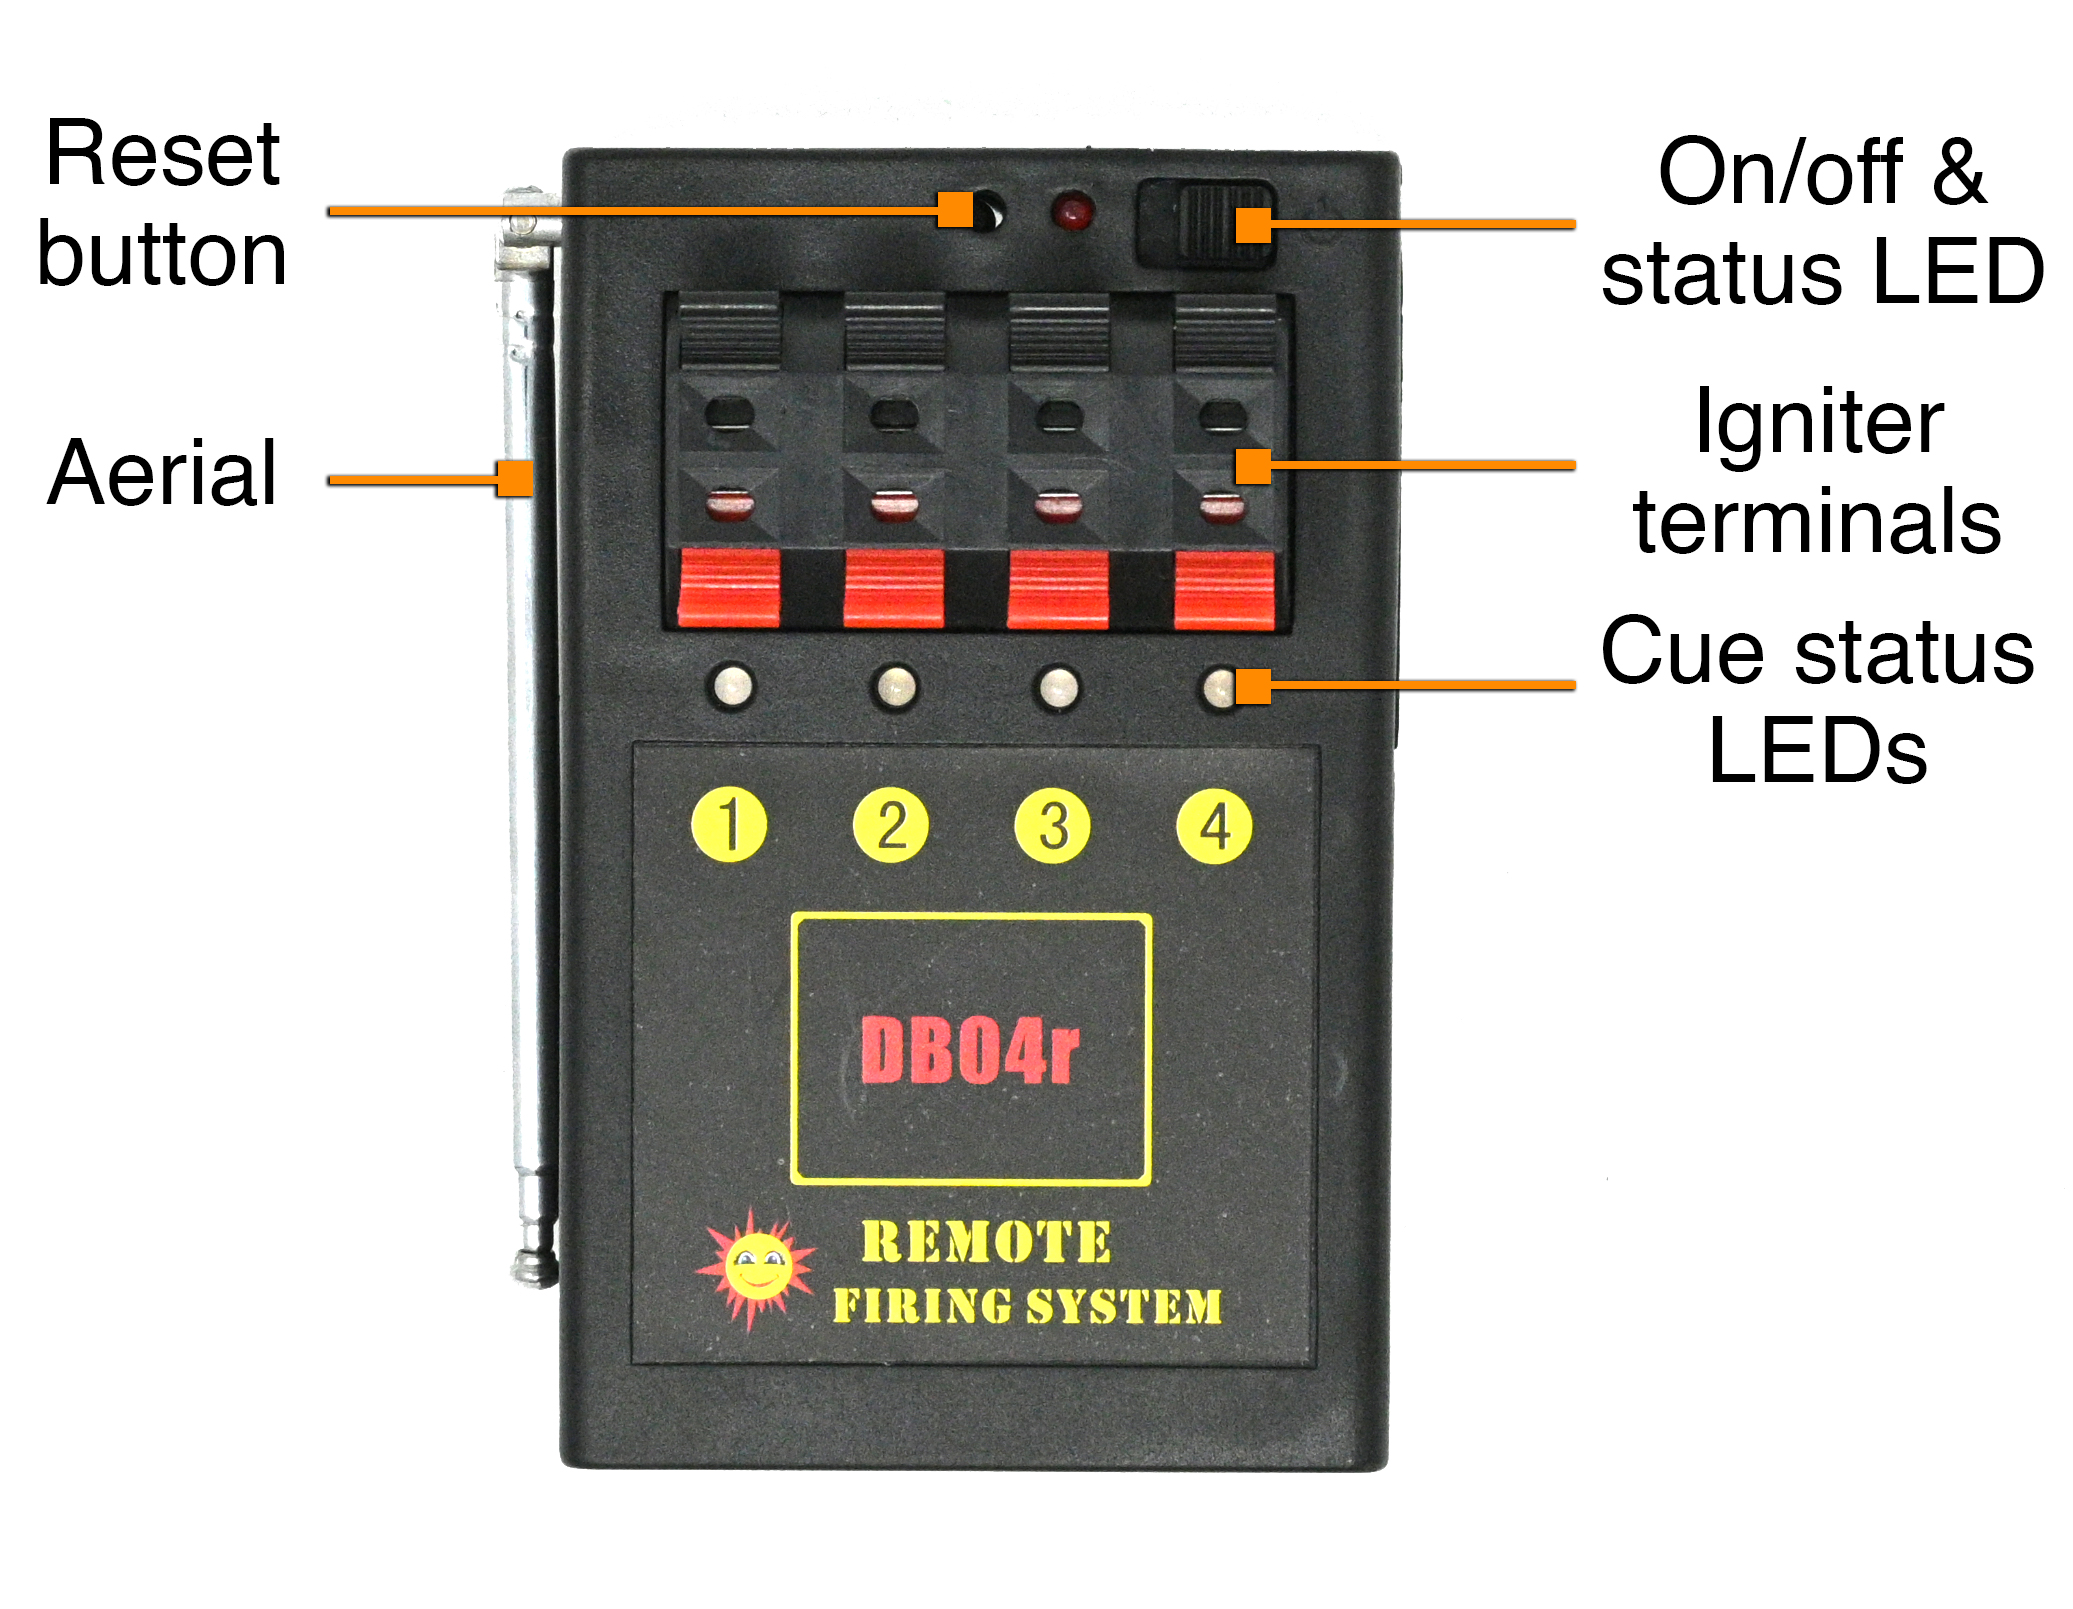
The top and bottom of the DB04r is shown in the images below:


Remote controls
The unit can be purchased with a 4 button remote control, a 12 button remote control or as a standalone unit. I recommend buying your initial unit with a 12 button remote as this will allow you to add one or two extra DB04r systems later to expand it to 8 or 12 cues. Both types of remote controls can be purchased separately.
The 4 and 12 button remote controls with my units took MN21/A23 batteries (one in each). Note: You will need a watch or precision screwdriver to take the back off the 4 button remote and insert or change the battery.
The 12 button remotes usually have an on/off button on the side, whereas the 4 button remotes have a sliding front cover to protect the buttons from being pressed when the unit is not being used.
Your remote controls should look like one of the following:

If you are buying a remote separately for the DB04r, be sure it is listed as being compatible with it. I have found, for example, that the 4 button remote that came with my RF Remo Tech 1 cue system, despite looking the same, would not pair with any of my DB04rs.
Igniter compatibility
The DB04r units I have tested are compatible – and work well – with Talon igniters which are non-pyrotechnic clip-on igniters that use a wire element to light the firework’s fuse. These are considered “consumer” igniters since you simply clip them over the fuse (the green fuse that you would normally light with a flame). No modification of the firework or its fuse is required.
They are also compatible with standard e-matches for those wanting to get into more advanced fusing, however, for this article I will remain focussed on Talons.
Igniters will only work once. They cannot be re-used.
Getting started and testing the unit
The unit takes 4 x AA batteries. It is strongly advised that you replace any free batteries supplied and use fresh AA batteries, ideally good quality branded ones such as Duracell or Energizer. I have been using Energizer alkaline batteries for my testing videos and they have worked well.
Switch the unit on. A red LED next to the on button should illuminate. No other LEDs at this point should be active as nothing is connected to the unit.
Using the supplied remote, press buttons 1 to 4. On the DB04r, LEDs under each connection should illuminate red in turn from 1 through to 4 as you press the buttons. Note: If using a 12 button remote, you may need to switch the remote on using a sliding switch on the side.
If cues 1 to 4 on the main unit do not illuminate when you press the corresponding button, check the troubleshooting section below.
It is recommended at this point you test the output from each cue using a suitable bulb, such as one of these. Inserting a bulb will create continuity (see basic operation below) and cause the LED on that cue to light up green. This means the DB04r can see there is something in that cue ready to fire. The LED on each cue will turn red when firing, then return to green afterwards (note: returning to green state is only applicable to using test bulbs. When using actual igniters the LED should go out after firing). When firing each cue, the inserted bulb should of course light up.
Basic operation
It is good practice to keep your firing system and remote control switched OFF while you are connecting igniters, attaching igniters to fuses and otherwise still setting up. The DB04r should only be switched on at the very end once all of your fireworks are secured and no part of your body is over any of the fireworks.
To connect an igniter, first strip off any insulation from the ends of the two wires. Where applicable this will usually be pre-cut and simply pulls off a centimetre or so at the end, some igniters are pre-stripped and have bare copper wire ready to go.
Push back the black and red clips on each cue to open the two holes and slide in the bare copper ends. One wire from the igniter should be in the black terminal and the other in the red terminal. It doesn’t matter which way around they go.
Ensure the wires coming out of the terminal are not shorted together. It is helpful to pull the two insulated parts of the igniter apart slightly before then inserting the bare copper ends into the terminals as shown below, as this leaves little or no bare copper showing:

If this is your first time using the unit, I suggest you connect live igniters (but do so outside) in order to familiarise yourself with the unit’s operation.
Once you have inserted one or more igniters and switched the unit on, each cue with an igniter connected should illuminate green. This is known as a continuity test and the unit is confirming it sees live connectors attached. If the LED does not light up green, then the igniter is either not connected, has already been fired, or is faulty.
It is important to know that if the wires of any igniter are touching (shorting) then you will still see a green LED as the DB04r cannot tell the difference between a shorted igniter and correctly inserted one. However, a shorted igniter will not fire.
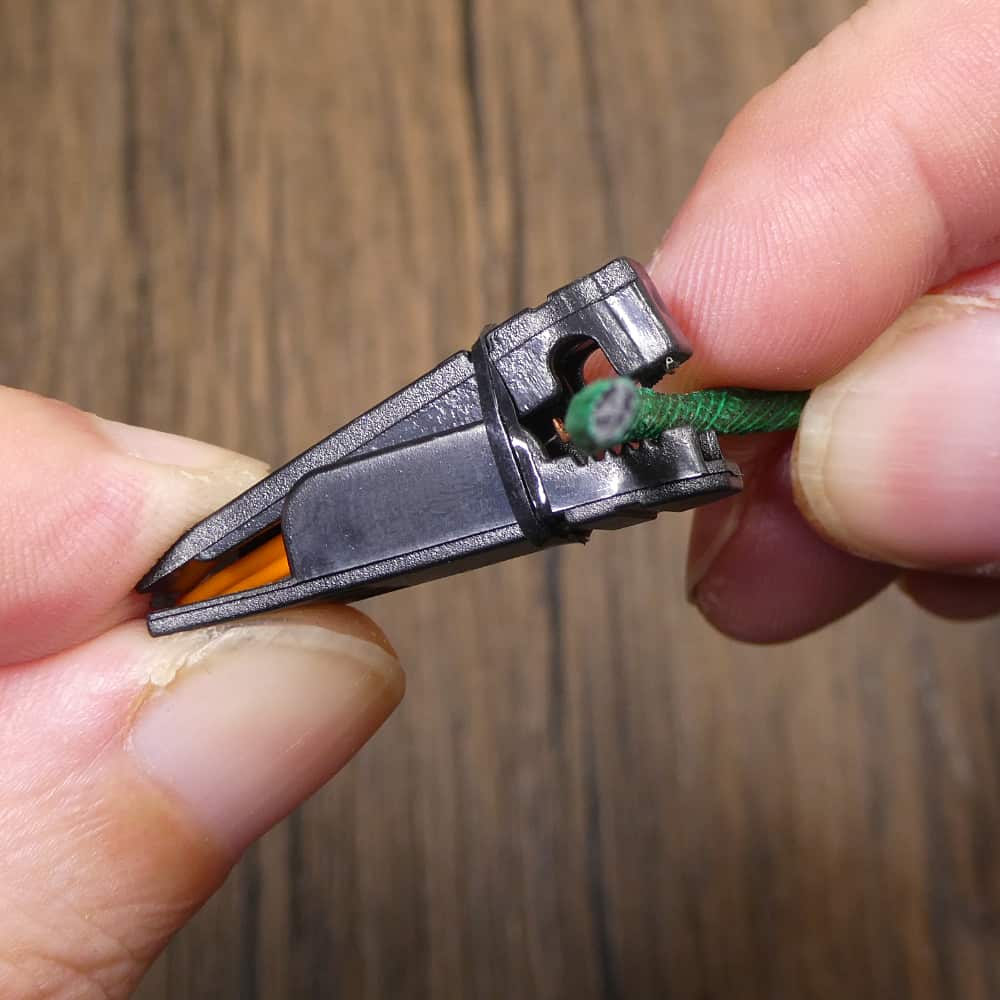
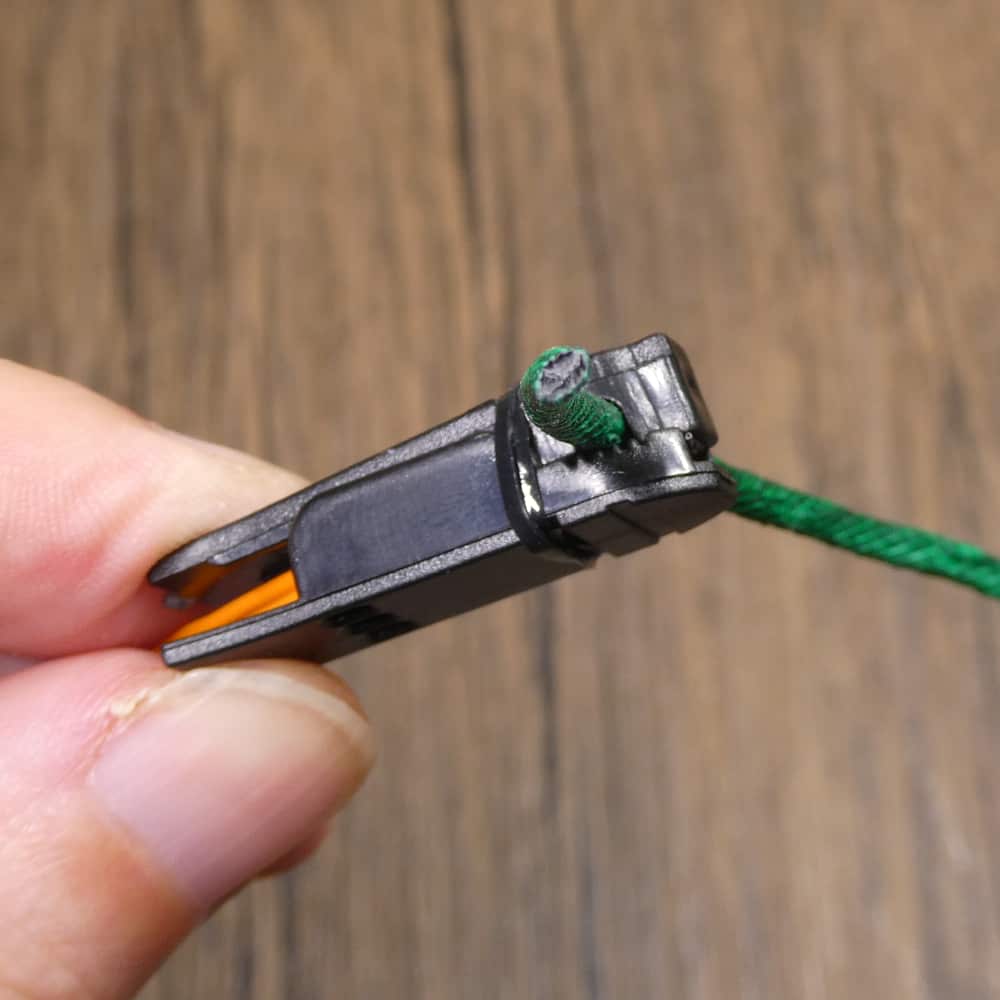
Talon igniters clip over the fuse on each firework as shown in the photos below. Be sure to open each clip fully, put it over the fuse (aligning the fuse with the hole) and then let it spring shut over the fuse. Never try and feed the fuse into the side of a closed clip or you will break the internal coil.


Once each igniter is fired, the LEDs will turn first to red as the cue is being activated (you’re not normally close enough to the unit to see this when firing live items) then it will go out, as once fired the igniters are basically broken circuits.
If you are new to remote firing or the DB04r, I recommend purchasing a number of additional igniters and also some visco fuse to practice on. This will enable you to get experience with both the firing system and also the igniters, before you fire your show for real.
Firing multiple igniters from each cue
You can connect more than one igniter to each cue, but please note that all of the igniters in each cue will go off together when that cue is fired. This is useful if you want to fire several different fireworks at the same time, as it will save you having to use up several different cues on your unit.
There are two different ways to connect multiple igniters, known as series or parallel wiring. With series wiring, each igniter is daisy chained together and only one wire goes into each terminal. With parallel wiring, each igniter is independently wired into the terminal.
This is shown in the photos below using vastly shortened igniters for the purpose of illustrating the wiring for two igniters:

It is usually recommended to connect igniters in parallel as this avoids a situation with series wiring where one igniter fires and breaks the circuit, preventing the others from firing. It is for this reason that Talon igniters must always be wired in parallel, never in series.
Reprogramming cues and expanding the unit
Each button on your remote control can be assigned to any numbered cue on the firing unit. This allows you to fire multiple cues from one button, or to expand the system by adding an additional DB04r and assigning it to buttons 5 to 8 on the remote, for example. You can even fire multiple cues on different DB04rs if you wish, useful for firing items in pairs but which are split across a wide firing area.
To tell a cue on the DB04r what remote control button should fire it, you must first put that cue into programming mode. You do this by pressing and holding the corresponding recessed button on the bottom of the unit (as shown in the overview photo at the top of this manual). The LED for that cue will start to flash.
Use something blunt to press the recessed switches, such as the flat end of a cocktail stick snapped in half.
You should also ensure the unit is not connected to any live igniters while reprogramming it (thanks Jon for this tip).
After at least three flashes, press the remote control button you wish to assign to that cue. Keeping the remote control button pressed, release the cue programming button first, then release the remote control button. The DB04r’s main LED power button should now flash and the programming is complete, which you can test by pressing the remote control button and checking the corresponding cue(s) light up.
You can watch a complete guide to reprogramming and expanding the DB04r in my video below:
In summary:
1. Press and hold the corresponding cue button on the underside of the DB04r for at least three flashes of the cue’s LED.
2. Keeping it pressed, press and hold the remote control button you wish to assign to that cue.
3. Let go of the cue programming button first.
4. Now let go of the remote control button.
You can also reset a DB04r to factory settings and pair it to a specific remote control:
1. With the unit on, press and hold the RESET button on the top of the unit near the on switch for at least three flashes of the power LED.
2. Press and hold button 1 on the remote you wish to pair.
3. Release the RESET button first, then the remote control button. The remote is now paired to that DB04r with the cues reset to buttons 1 to 4 on that remote.
Example 1: Firing multiple cues on one DB04r from one remote button
Let’s say you want cues 1 and 2 to fire at the same time, from button 1 on the remote. Assuming button 1 is already paired to cue 1, you need to tell cue 2 to also activate from button 1. Here you would press the programming button for cue 2 on the DB04r and press button 1 on the remote, following the instructions above. You can return cue 2 to button 2 at any time either by programming it back again to button 2, or reseting the unit.
You can, if you like, assign all 4 cues to one button on the remote, so it becomes a “fire all” unit.
Example 2: Adding an additional DB04r to a 12 button remote and assigning it to buttons 5 to 8
In this example you would already have one DB04r and a 12 button remote which fires cues 1 to 4 from buttons 1 to 4. To add an extra unit to fire from buttons 5 to 8 on the same remote (thus making it an 8 cue system from one remote), you should use the programming buttons on the second DB04r in turn, from cues 1 through to 4, whilst assigning buttons 5 to 8 on the remote control to each of those cues.
You can, from here, add an additional DB04r and assign buttons 9 to 12, making it a 12 cue system from one remote.
Example 3: Firing two DB04rs in pairs off one remote
Here the idea is to fire cue 1 on both DB04 units at the same time when pressing button 1 on the remote, fire both cue 2s together on button 2 and so on.
The easiest way to do this is to factory reset the additional unit to the same remote control as the first unit, as explained above. This will now pair both DB04 units to the same remote, so they fire in unison.
(Note: You could also program each cue on the second DB04r individually to each remote button if you wish, but it is quicker to do a reset).
Weatherproofing the DB04r
Given that the unit has open holes drilled in the bottom to access the reprogramming buttons, a non-rubberised battery compartment, plus holes in the four terminals, then protecting this from rain and damp should be considered critically important.
At the very least, the unit should be placed in a closed plastic bag. However a hard plastic case is preferable as this offers some protection from hot fallout from your fireworks which might otherwise melt a bag. Options range from supermarket food boxes up to Peli or Sea Horse cases.
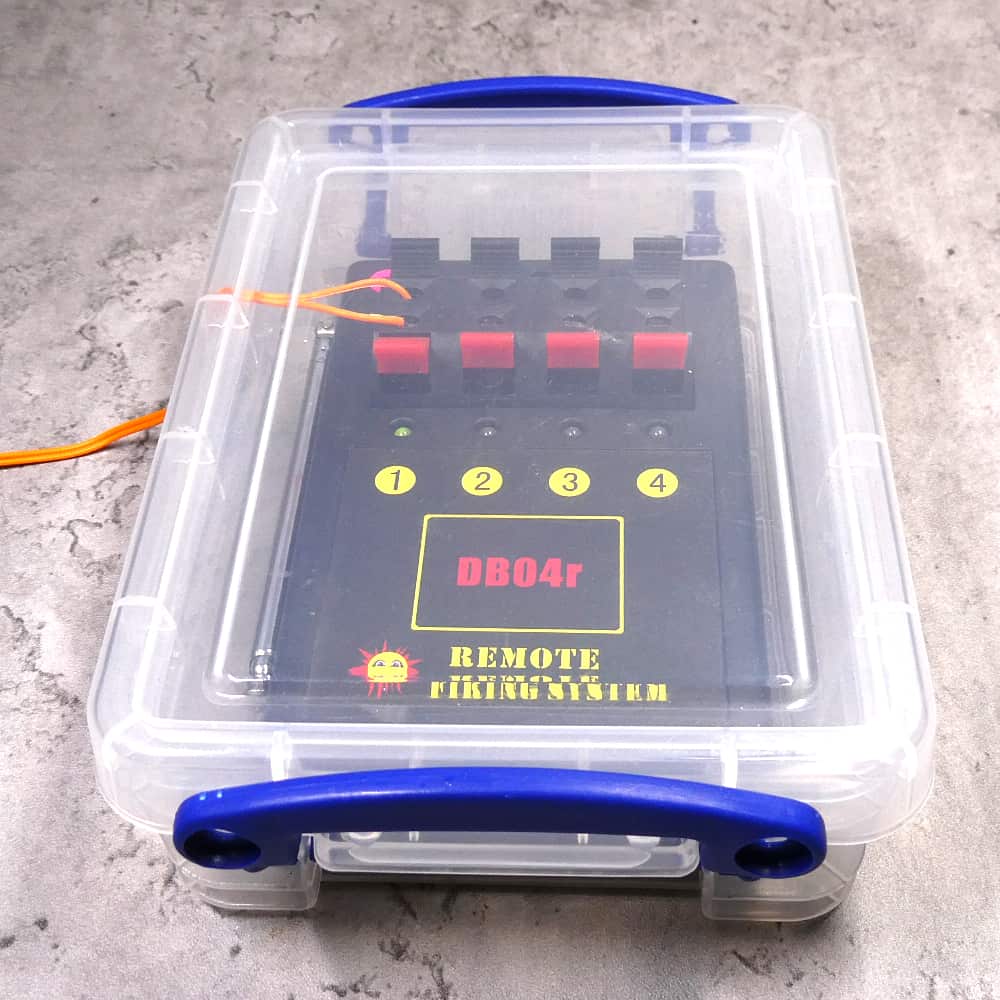
My personal recommendation is a Really Useful Box. These have lids which are easy to put on and take off, have some give around the rim to allow the igniter cables some freedom to move, and are inexpensive (around £3-£5 each). In the photos below, you can see how the unit fits nicely in a 0.35L box first of all, then a 0.7L box which offers double headroom and is pictured in use as a storage box also, with the unit’s batteries and remote control


Other suggestions for protecting the unit include putting it under a bucket, under garden fixtures and so on. I have a video exploring these suggestions, which although focussed on a different system are equally applicable to the DB04r. You can watch this video here on my YouTube channel.
Troubleshooting
The unit does not turn on.
Check the batteries are fresh and in the right way around.
The cues do not respond to the remote control.
1. Check the remote control is working; the 4 and 12 button ones shown in this article have a light-up LED when you press a button. If yours is the same but the LED does not light up, check the batteries in the remote.
2. Check that the remote control is paired up to the unit. You can either perform a reset or try assigning an individual button to a cue, both are described above in the reprogramming section.
If you are sure both the remote and unit are working, it is possible your remote is from a different system and is not compatible.
The system shows continuity but the igniter will not fire.
1. It is possible that the igniter is shorted. Check that the bare wire ends from the igniter are not touching each other before entering the terminals.
2. Your unit might be running out of battery power. Check the batteries are fresh and are of a good quality brand. Extreme cold might also effect their performance.
The system does not show continuity when an igniter is connected.
1. Check you have wired the igniter fully into the terminal (so it grips the wire).
2. Check the wire entering the terminals is stripped (i.e. bare copper) and not still insulated.
3. Has the igniter already been fired? You can only use them once.
4. The igniter could be faulty, or you damaged/broke the coil when clipping it on to the firework’s fuse. Try another igniter.
Need any further help?
I hope this online manual has given you a good overview of the basics of the DB04r system. You can find further help on a variety of related topics in my firing systems articles section, plus my YouTube channel.